CRYSTALLINE BOTTLES
THROWING
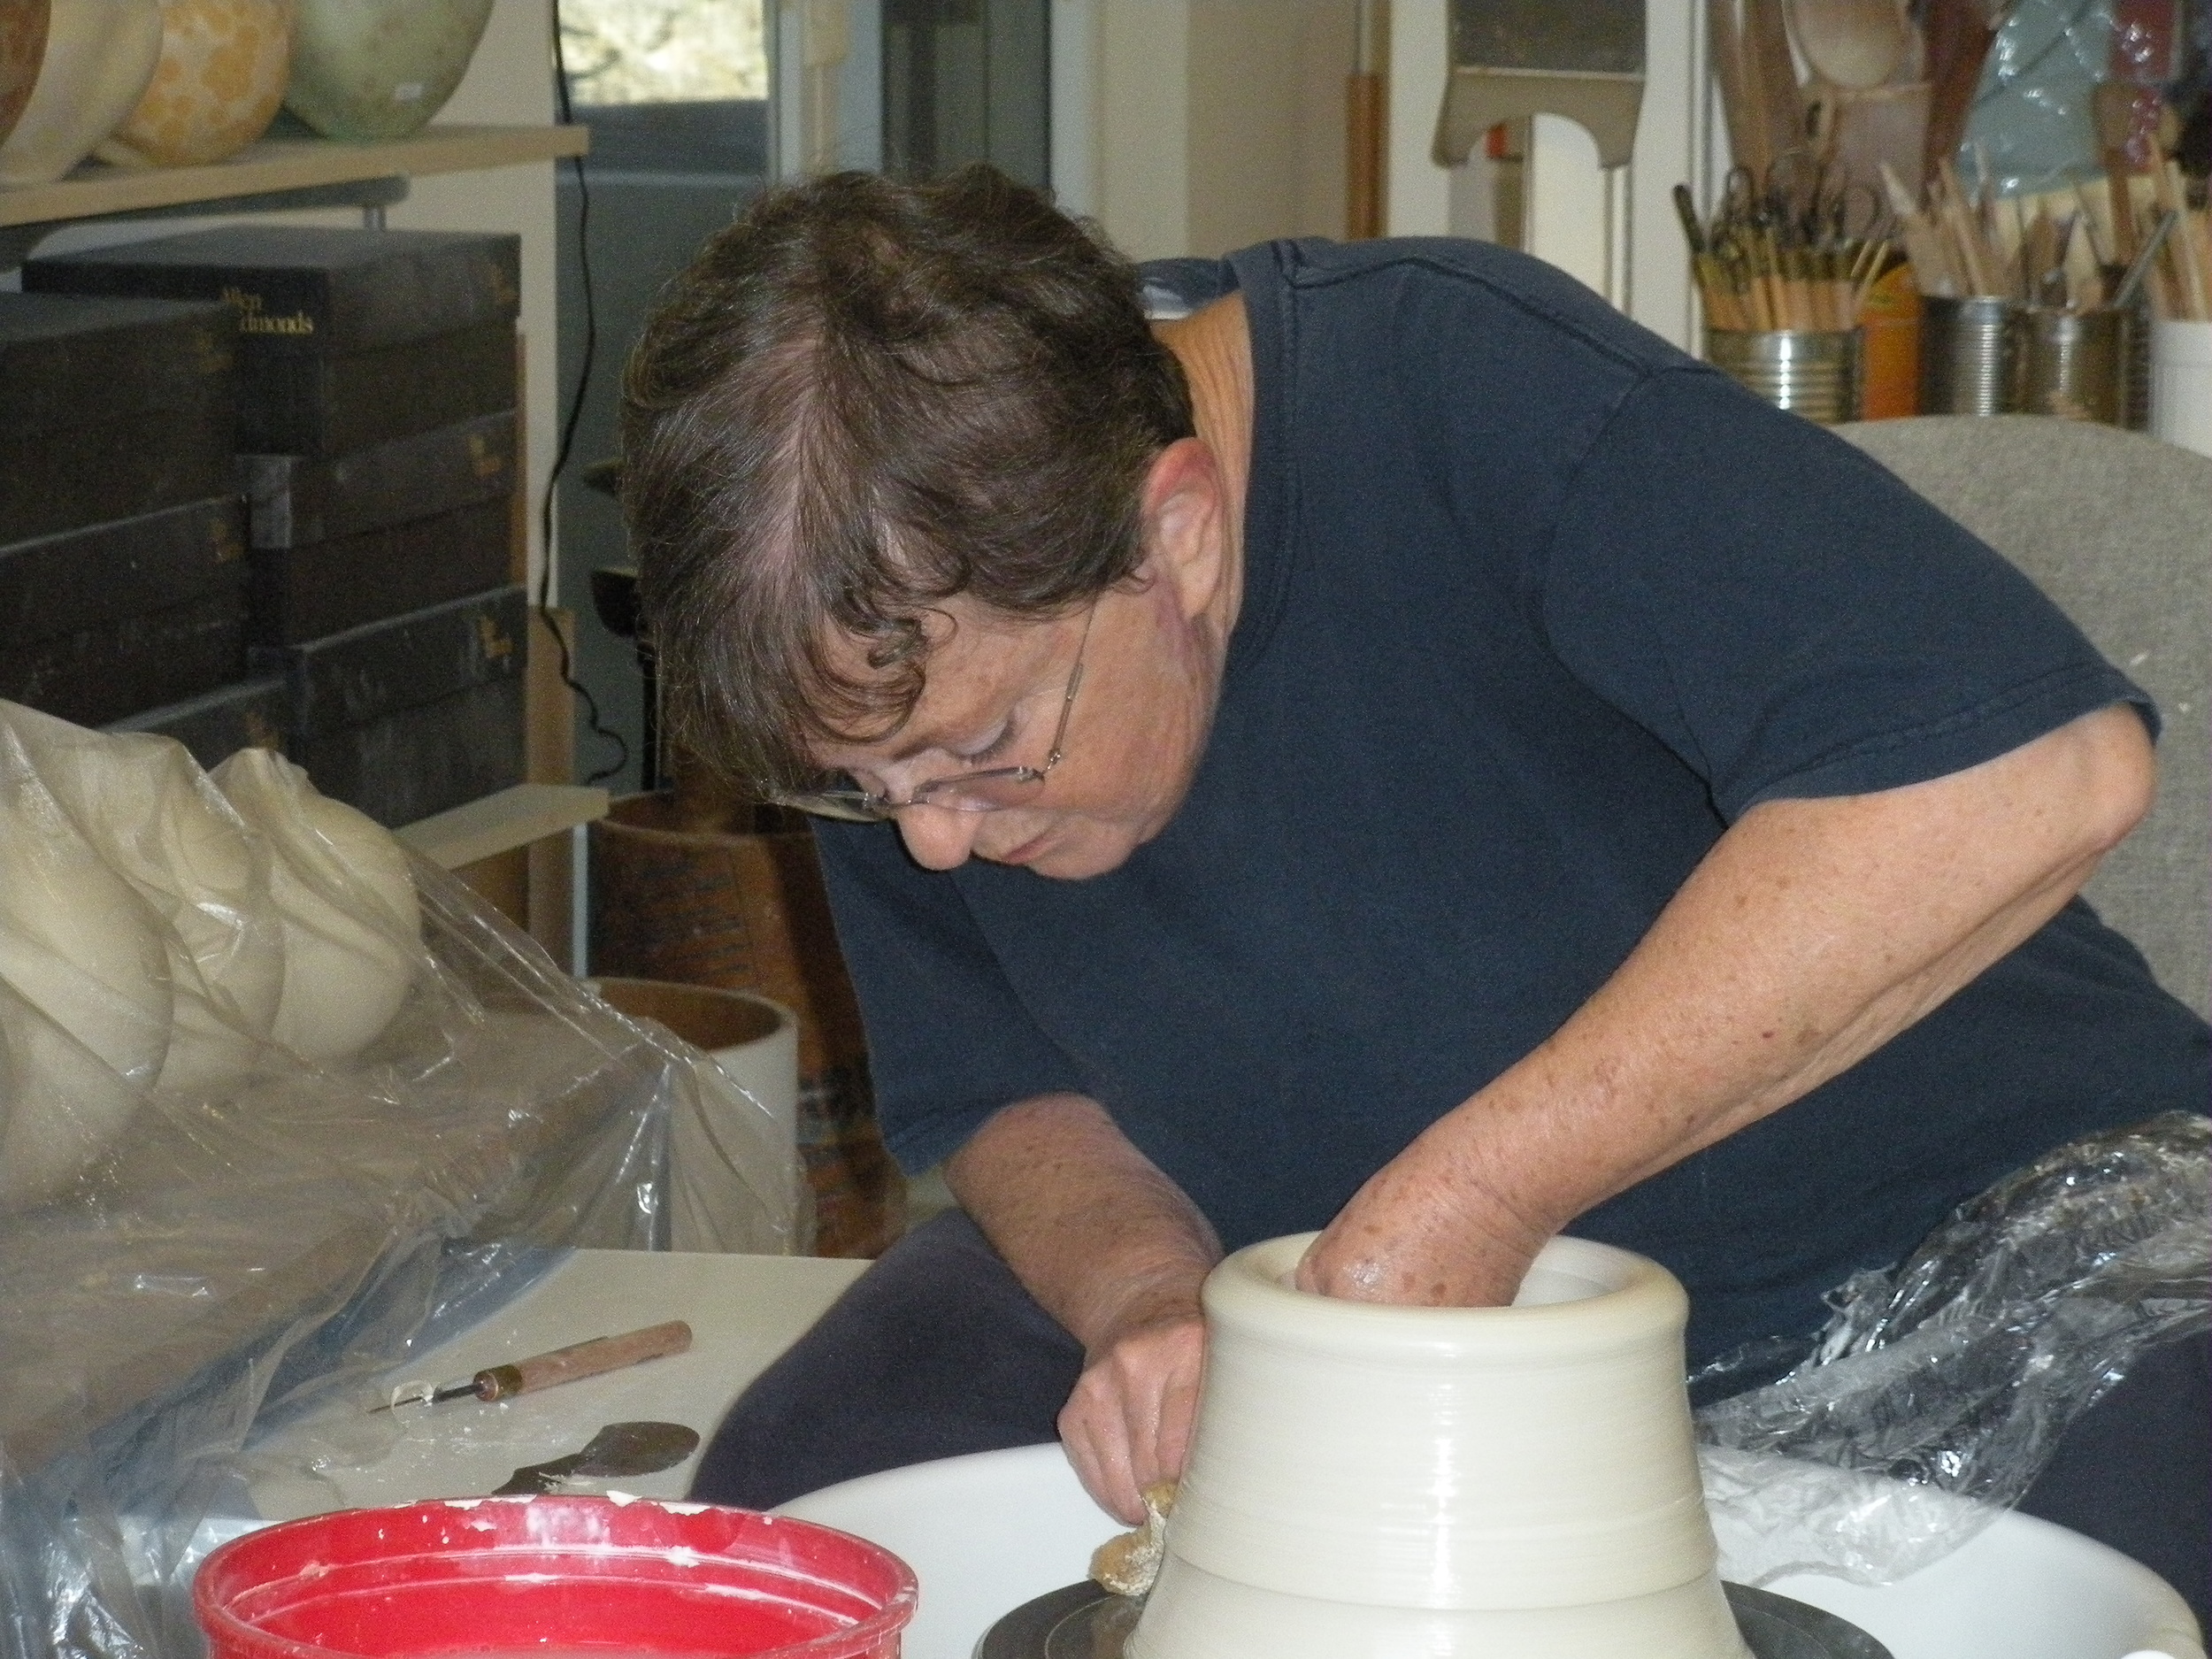
I throw each piece on a potter’s wheel. Then I set the pieces aside under plastic to stiffen up enough to trim on a chuck thrown from clay. After they are trimmed, they sit on racks until dry. Before their first firing (which is called “bisque”), I sand each one to ensure an ultra-smooth surface on which to later apply glaze. The bisque is fired to just over 1800° F. When the pots are pulled from the bisque, they are washed to remove any excess dust or contaminants. Each bottle is then attached to a pedestal using a mixture of Elmer’s Glue and Kaolin (which melts at a higher temperature than the porcelain.) When fired, this mixture creates a seam, which allows me to easily separate the bottle from the pedestal.
SPRAYING
I then use an airbrush and spray booth with exhaust fan to spray the glaze on each piece. Because the bisqued pieces are porous, the glaze sticks to the bottle as then water is absorbed. Each bottle and pedestal must be fired on a catch-plate because crystalline glazes run off the pots. The glaze pools in the catch-plate, not on my kiln shelves.

FIRING
The electric kiln holds between 14 and 18 pieces on two rows of shelves. Nearly every firing contains test tiles, which are actually discs sitting on pedestals fired on catch plates. When I close the lid of the kiln, the firing is now in the hands of the kiln gods.
I have a digital pyrometer (temperature probe) and am able to program my computerized controller for the firing. To verify the temperature I also use pyrometric cones designed to melt at a specific glaze maturity. My glazes fire to cone 10 or 11 (just over 2300°F). The kiln has to fire up to glaze maturity temperature and hold at that temperature for a while before I drop the kiln to 2000° where the primary crystals form. I hold for an hour allowing the crystals to grow.
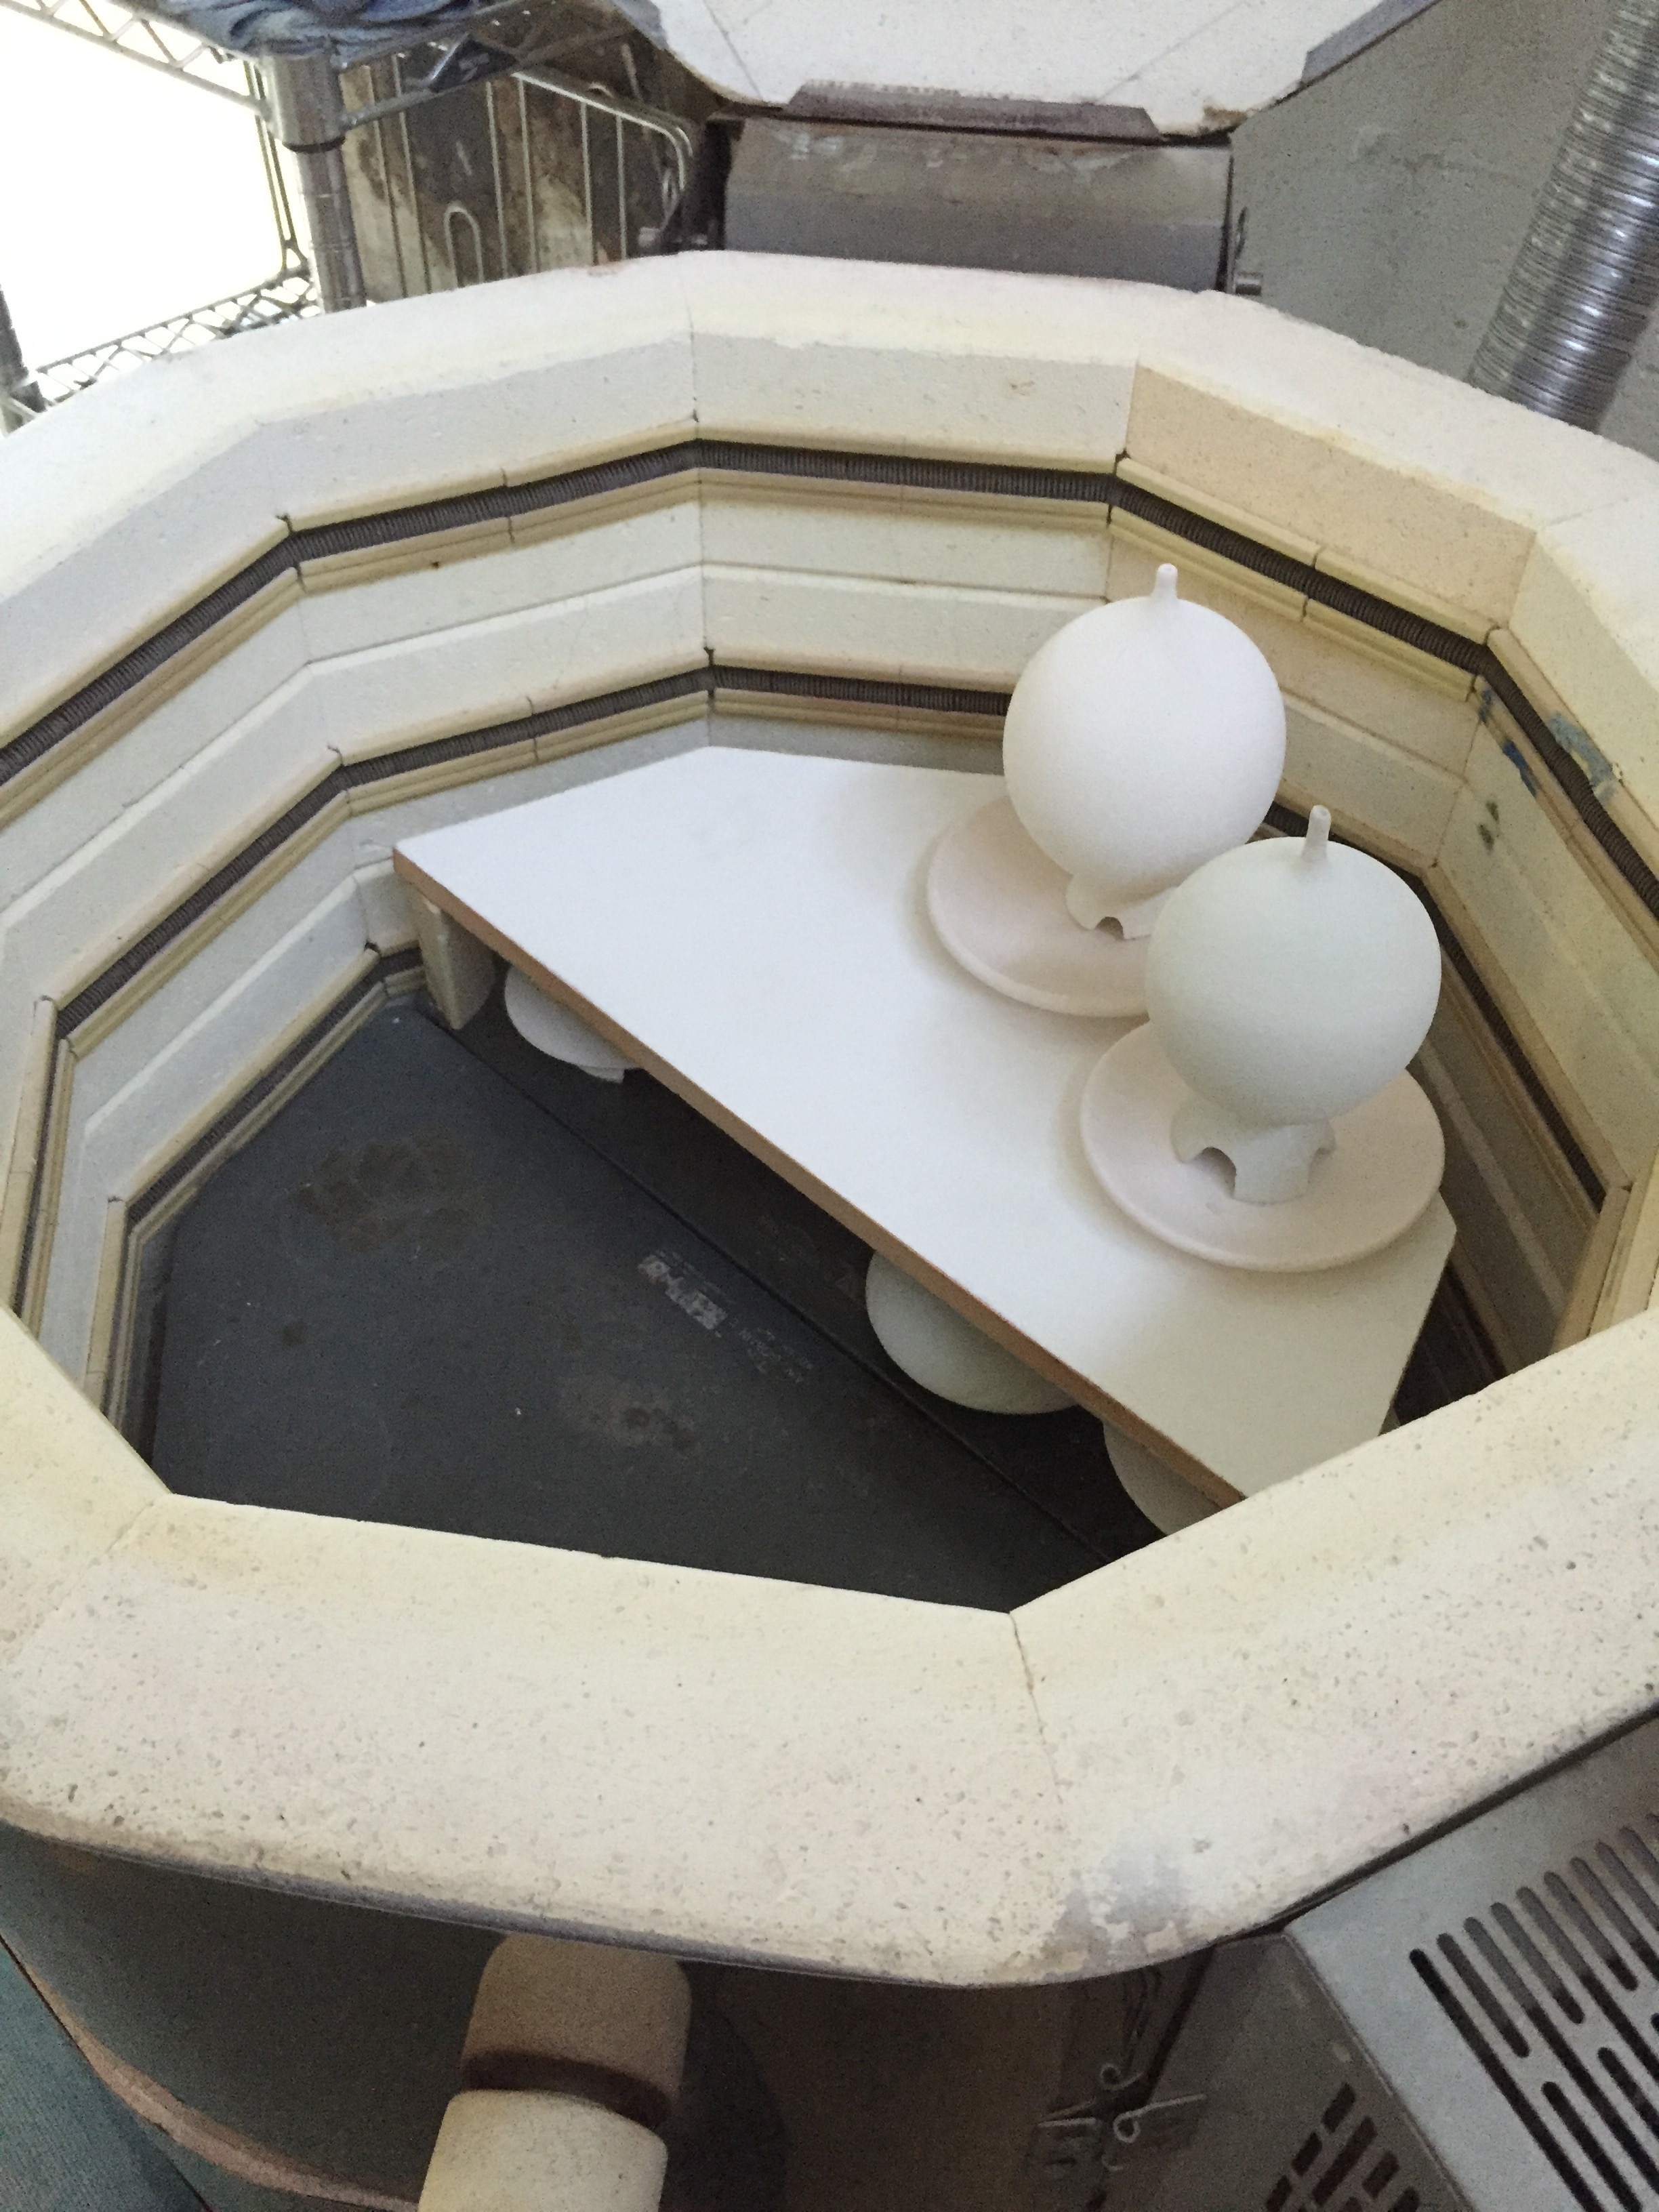
Depending on the cycle and what I want to achieve, I raise the temperature and lower it 25° or 50° to create halos or rings around the primary crystal. The entire cycle takes 24 hours: the firing takes about 13 to 14 hours to complete and another 10 hours to cool down sufficiently to open the kiln.
Crystalline glazes are very finicky. So much can go wrong during the firing. Breakage, a pot moving off its pedestal, the glaze not looking like I want it to, fracturing while releasing bottles from the pedestal, or even a piece tipping over, causing a domino effect and destroying other pieces on the shelf – there is rarely a firing without loss. It is not unusual to get only a handful of gallery-quality work out of a firing.
The bottles are released from the pedestal either by tapping with a small hammer or using a crème brulée torch to heat the pedestal until it cracks off the bottle with a sharp pinging sound.
There are no seconds. Every piece which doesn’t meet my expectation gets smashed. My husband jokes that the largest collection of my work can be found in the Dade County landfill.
GRINDING
The final step in the process is grinding the bottom on a diamond grinding wheel so that the piece has a smooth foot and can sit on a surface without scratching it. How the surface feels is important to me. If necessary, I will also sand any rough crystals to produce an ultra-smooth surface.
These crystalline glazes have been formulated by trial and error over a fifty-year career. For the past decade I have devoted nearly full time to formulating the palette of glazes I now use. At one point before culling, I had approximately 10,000 test tiles hanging in my studio.
While there may be similarities, since only specific elements will produce crystals, developing a line of colors and crystals takes endless hours of mixing and testing to get the colors and textures that I want. It is very important to me that the glaze feels the way it looks.
CARVED BOTTLES

Carving on unfired, bone-dry porcelain.
All my carving is done on bone-dry porcelain. My designs are done free-hand. I eyeball the design and sketch it out on the dried piece in soft lead pencil which either gets carved away or gets “fired out” during the bisque firing.
Dried clay is very fragile and breakable during the carving. Think of a dried piece of dirt which when picked up will crumble in your hand: that’s what I am carving on. One slip of the tool or hitting a weak spot on the pot and the work can crumble in my hands.
The carved pieces can take anywhere from 8 hours to more than a week to complete. The carved pieces are also bisqued to 1800°F and glaze fired to cone 10, about 2300°F. I use transparent glazes that bring out the detailed multi-layered effects because the glaze pools in the carved lines, making them appear darker and thus highlighting the intricate designs. The glaze firing is less complex than the crystals and doesn’t require pedestals or catch plates. The firings are more reliable and there is much less loss during firing. But the carving itself is both difficult and hugely labor intensive.